
When was the last time you built your own tools? How is your tool looking? As a wood or metal handyman, you need to make numerous helpful and important tools. However, it also means that you have the right tips and knowledge on how to make these simple tools. If you are planning to make bandsaw mill plans for your projects, you will need in-depth knowledge to make the greatest and strong sawmill plans.

To make your search easier, we have put together a guide to help you create the best homemade bandsaw mill plans. It’s a simple guide, and if you follow our tips carefully, you’ll be building great homemade bandsaw mill plans in no time.
What is a Band Sawmill?
You see many carpenters using a bandsaw sawmill, chainsaw mill, a table saw, circular saw, etc., to cut and designs materials, but have you taken the time to understand what a band sawmill is, for instance. Well, this is a machine with two band wheels and a saw head. It comes with a reliable steel band blade that monitors the band wheels—an A-frame with a track that directs the saw through the log. Users often move the saw head towards the cut logs. This tool, just like the circular sawmill and chainsaw sawmill, makes things easier and saves a lot of time and effort.
How do you Make a Homemade Sawmill?
Here, I have prepared some tips that will help to make a stronger and more practical bandsaw that will function just like a portable chainsaw mill. But before embarking on this precious journey, I must first answer one of the most common questions that many people worry about. How much does it cost to build a band sawmill? Well, the price usually relies upon the kind of DIY sawmill you want to construct. A portable sawmill costs approximately $1,500 for the base mill and optionally over $500 for a mechanical forklift to place the logs on the bed.
The stationery sawmill will cost $ 5,000 or $ 6,000, but the motor bought new, and about half that used and still needs to be installed. Now after knowing the cost, follow these steps, and you will learn how to make an awesome homemade bandsaw sawmill.
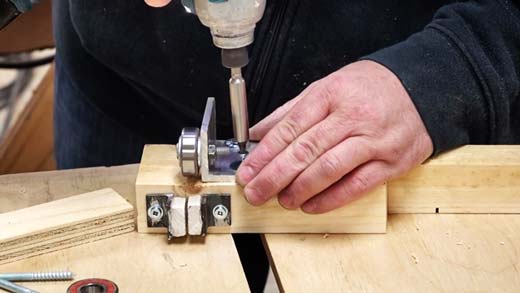
Step 1. Construct the Wheels of the Mill
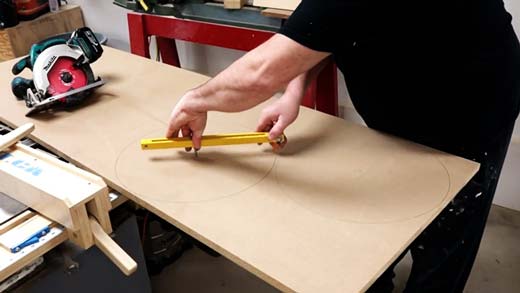
Take a three-quarter MDF board to design these wheels and a beam compass. The beam compass is used to cut circles and cut the two 16-inch wheels out of them.
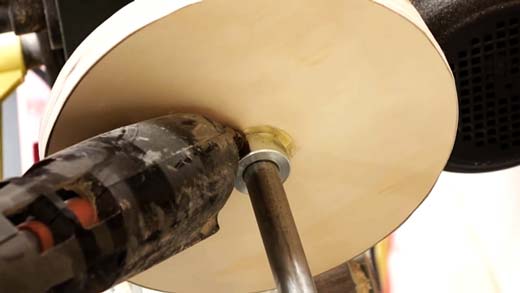
Step 2. Make a Pulley and a Shaft
Next, make a pulley for the wheel. To make a pulley, take three-quarters of an inch of plywood and design a seven-and-a-half pulley. Take a drill press and drill a 5/8 inch hole in the center of the wheel where the axle passes.
Step 3. Tighten the Pulley
Well, here, you need to have some hot met glue and stick the shaft collars to the pulley. Using a set screw, tighten it so that it does not rotate.
Step 4. Make a Small Disc
This small disc acts as a spacer. The disc is must be between the bandsaw wheels and pulley before assembling them. Stick the pulley to the spacer and from the spacer towards the wheel.
Step 5. Bolt the Wheel Bearing Blocks to the Wheel
In the next step, the 2 wheel bearing blocks are bolted to the bandsaw wheels. This is done on both sides using 4 three eight-inch threaded bars. Ensure these threaded bars are properly seated in the hole inside the wheel. However, the bearing blocks can move freely. An excellent technique for securing these bearing blocks is to put some construction glue around the edges, so they don’t move back and forth.
Step 6. Constructing the Frame for the Band Saw Mill
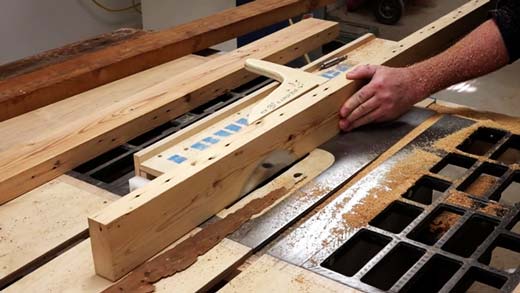
It is recommended to build a band sawmill frame with 2 x 4 straight salvaged boards. Use the bench hand plane to remove any warping in the board and smooth the corners so the boards are flat. Most of the time it takes many shallow steps to go flip the lumber every time to clear the twists, turns, and faults.
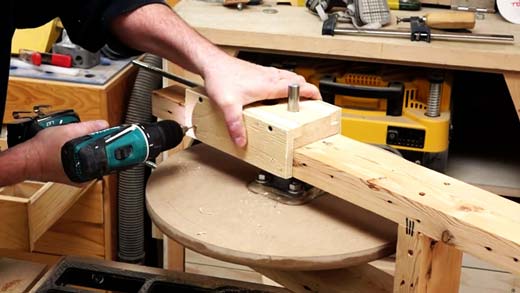
Step 7. Assemble the Frame
2- Frame pieces grasp the wheel on the fixed drive wheel and are positioned 8.5 cm from the end. There are 2- 5/8 inches’ holes made in both frames to allow the shafts to suit snugly. A hole is drilled on the other side that will provide the space to alter the wheel. You are as well urged to create an adjustment collar using plywood that locks the frame and axle. The collar may be shifted to change the wheel. Take a few pieces, place them over the frame, and tighten them to keep the supporting boards in place.
Step 8. Assemble the Front Wheel or Top Wheel
On the other side, mount the front wheel or the upper wheel. Make sure the wheel shifts back and forth to increase the tension on the band saw blade. It must also have a monitoring system. In this situation, you need to create two small pieces that will screw onto the front wheel axle and move back and forth. A guide piece is buried in this object. A one-inch hole is made in the slider, and a three-eighths-inch threaded bar is screwed in with a nut and washer. These bars assist increase the tension on the saw blade and change the control.
Step 9. Put the Silicone Caulking
Before placing the saw blades onto the wheels, you need to smoothen the wheels with silicone caulking. These are good compared to bicycle internal tubes because they don’t fall off. The next step is to attach the legs to the frame using the reinforcement blocks.
Step 10. Install the Motor
Now, it’s time to place the motor in the frame. To do this, take a melamine board and screw it onto the fixed bandsaw wheel utilizing across the board. The melamine works by supporting the motor and supports the top to prevent swinging. Tighten them to prevent shifting while slicing.
Step 11. Design the Blade Guide
The band saw blade guide sits close to the bottom to protect the saw blade when it snaps and comes off. These guides consist of a small angled piece of steel attached to a piece of ceramic. The guide is designed so that it does not touch the blade when cutting. It only keeps the bandsaw blade locked in if it tends to twist.
Step 12. Install the Thrust Bearing
This thrust bearing is made up of a normal size ball bearing; it’s usually mounted on an aluminum bracket that is further connected to the blade guide.
Step 13. Finalize the Construction
Create a dolly cart using a 2 X 4 board and a few castors to put the large maple logs and adjust it easily and quickly through the saw blades. The rollers are bolted with quarter-inch holes at the ends. These rollers are secured to only slide back and forth in one direction.
These tips are easy to follow, and if you keenly follow each step, you will make incredible DIY bandsaw sawmill plans. Is a band sawmill worth it? A portable sawmill is a useful lathe tool and is worth buying or building. It is an excellent source of lumber for specific projects and provides you with additional business. To get some lumber and start your business, a portable bandsaw mill such as a wombat sawmill is an essential tool in your garden. If you are trying to ask yourself who makes the best portable sawmill? Why not try Peterson Portable Sawmill? The company produces quality, portable, and 100 percent effective lumber mills.
Cost to Buy a Portable Bandsaw Mill
If you are planning to get a lumber mill, you may think, how much does it cost to buy a sawmill? A person will be required to cough between $ 4,000.00 and more than $ 80,000.00. However, this depends on the desired production volume. To avoid the hassle of going out to the market and searching for the best band sawmill manufactures, why can’t you gather the right materials and equipment to make a great homemade sawmill to help you with any woodworking project.
Is it Cheaper to Mill your Own Lumber?
It’s not that easy, but if you decided to cut logs personally, you are guaranteed to be able to produce high-quality lumber materials in a short period of time. This means that you choose ways to cut the wood and are in control of the drying process. With the experience that I have, you will receive dimensional lumber of a much higher quality than you could easily buy.
We did an authentic review for the bandsaw fence guide to have a precious cut. Here is the source you can check that if you need- Best Aftermarket Bandsaw Fence as well as you also can have a look for a well-branded portable bandsaw.
Final Verdict
Above are simple to follow to make the best homemade bandsaw mill plans; just by following them, you will quickly make complete portable sawmill plans that will function effectively and help you during your wood projects. It’s a cheaper process, and all you must have is vital materials to make the process a success. It won’t cost much, and you will end up making a simple homemade bandsaw mill worth every use.